Step 1: Setting up list data fields and gallery mode
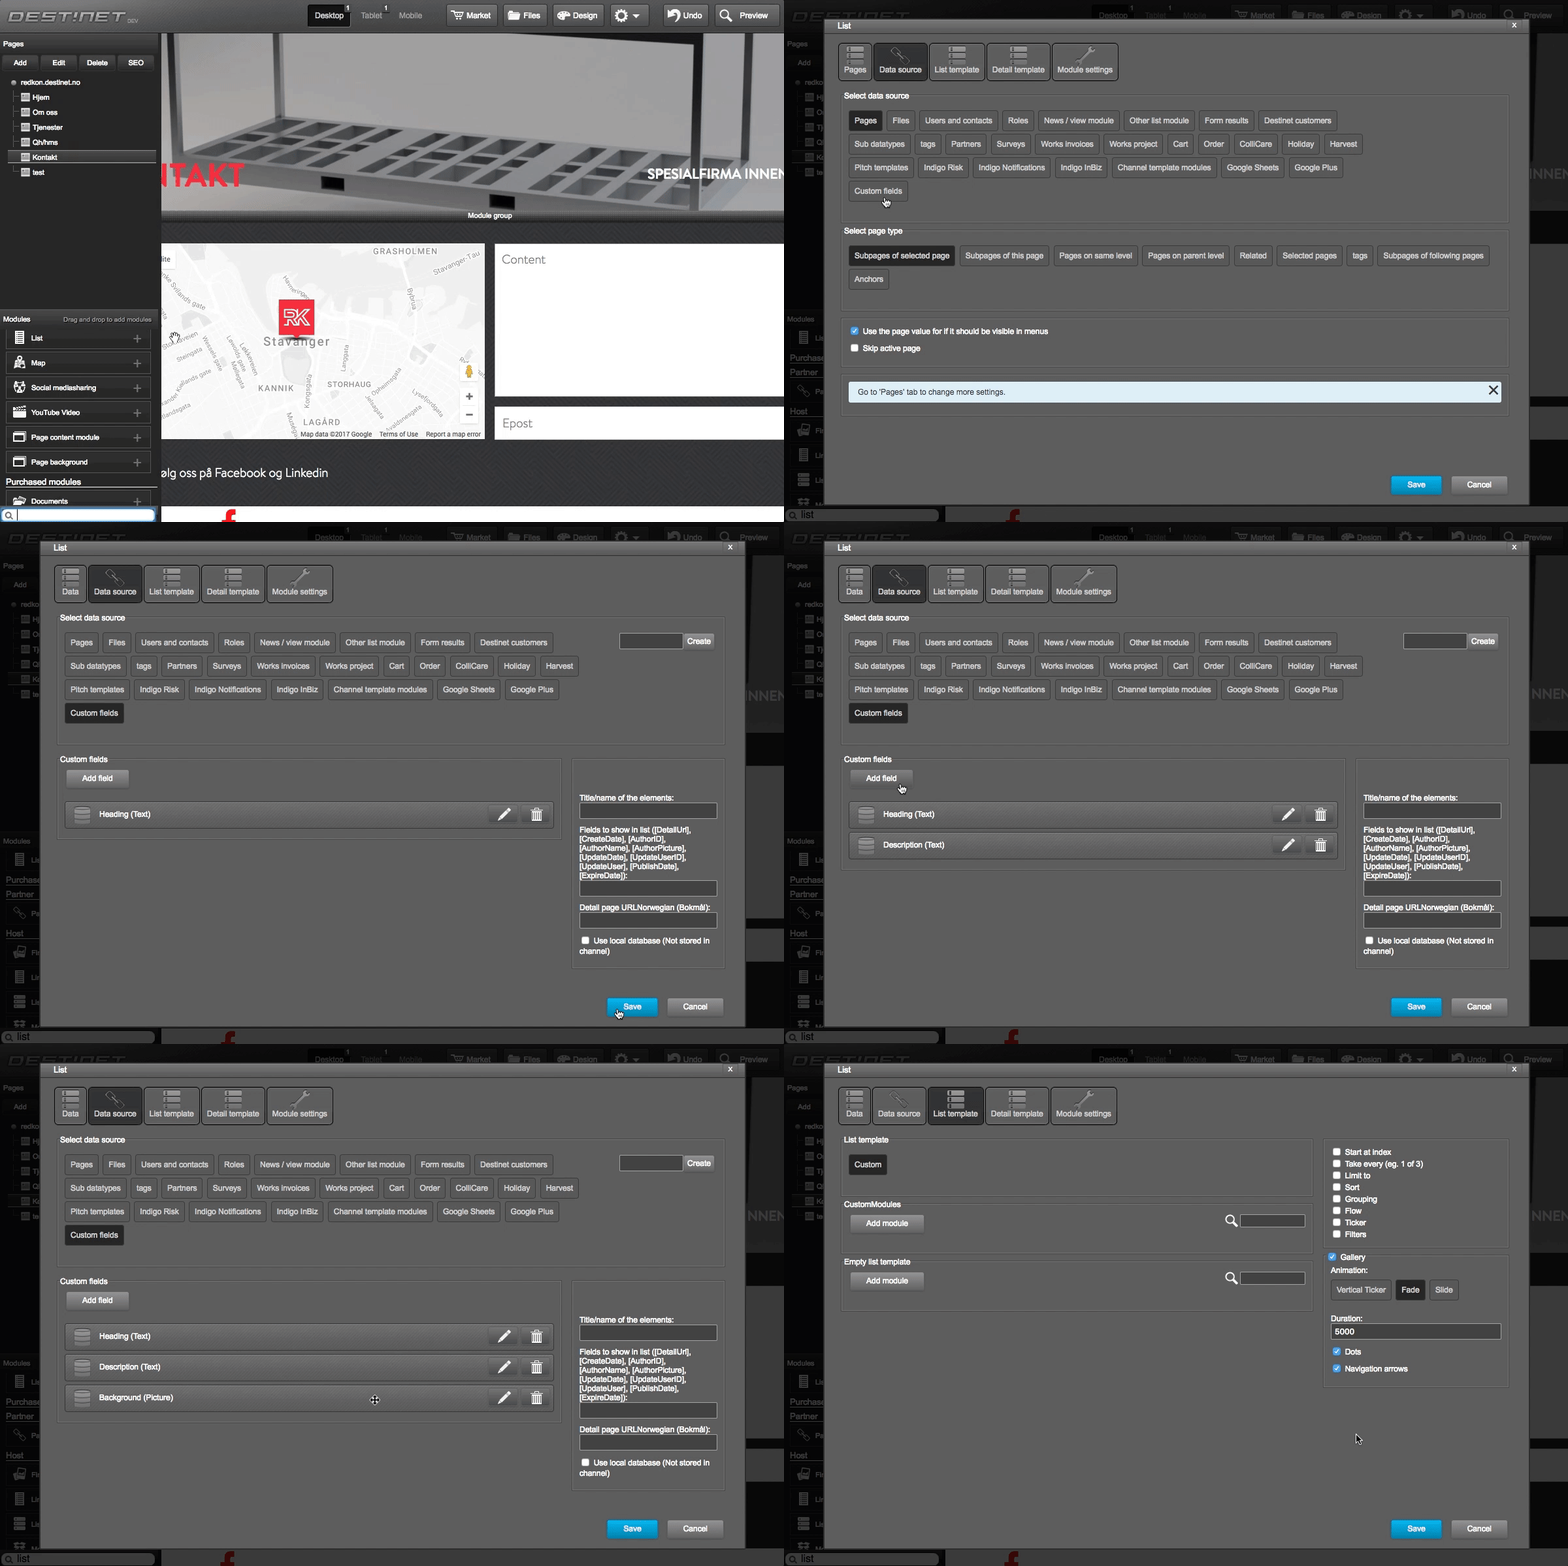
In this example, we will create a list module with various data fields for gallery.
- In Modules panel , find and select List module
- Select Data source tab, and select Custom fields
- Click Add fields and add following data fields
- Type: Text - Name: Heading
- Type: Text - Name: Description
- Type: Picture - Name: Background
- Go to List template tab
- On right site, enable Gallery option, and set Fade Animation with 5000 Duration
- Check Dots and Navigation arrows checkboxes below
- Click Save to save List module
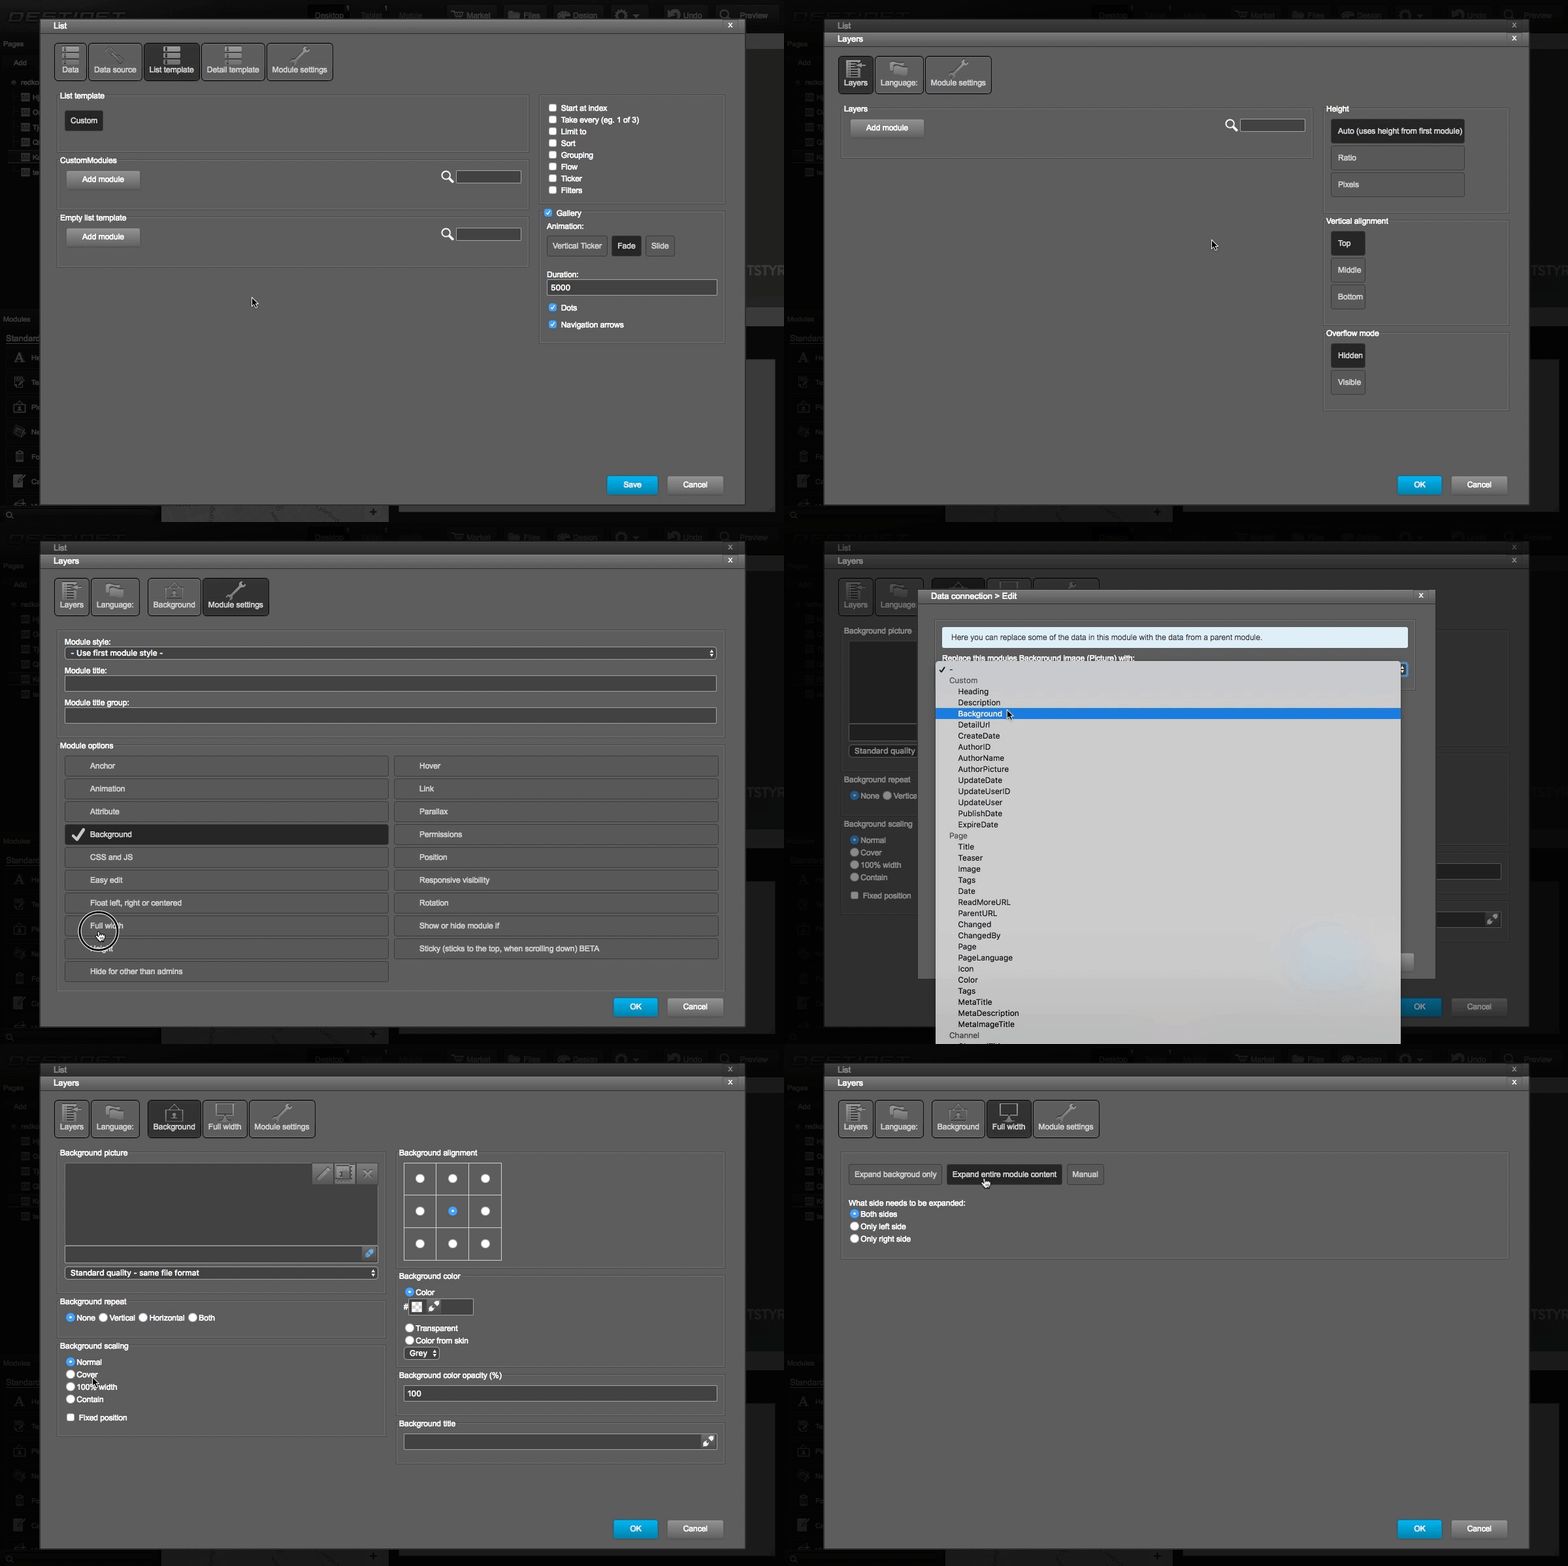
Step 2: Setting up layer module
- Select Add module in List template tab
- Find and select Layer module
- On right side of Layer module, select Middle option at Vertical alignment
- In Module setting, select Full width, Background options
- Select Background tab, select Plug-in icon, select 'Background' name which we have created in Step 1. Then click OK
- In Full width tab, select 'Expand entire module content' to set fullwidth for both content and background. Then click OK
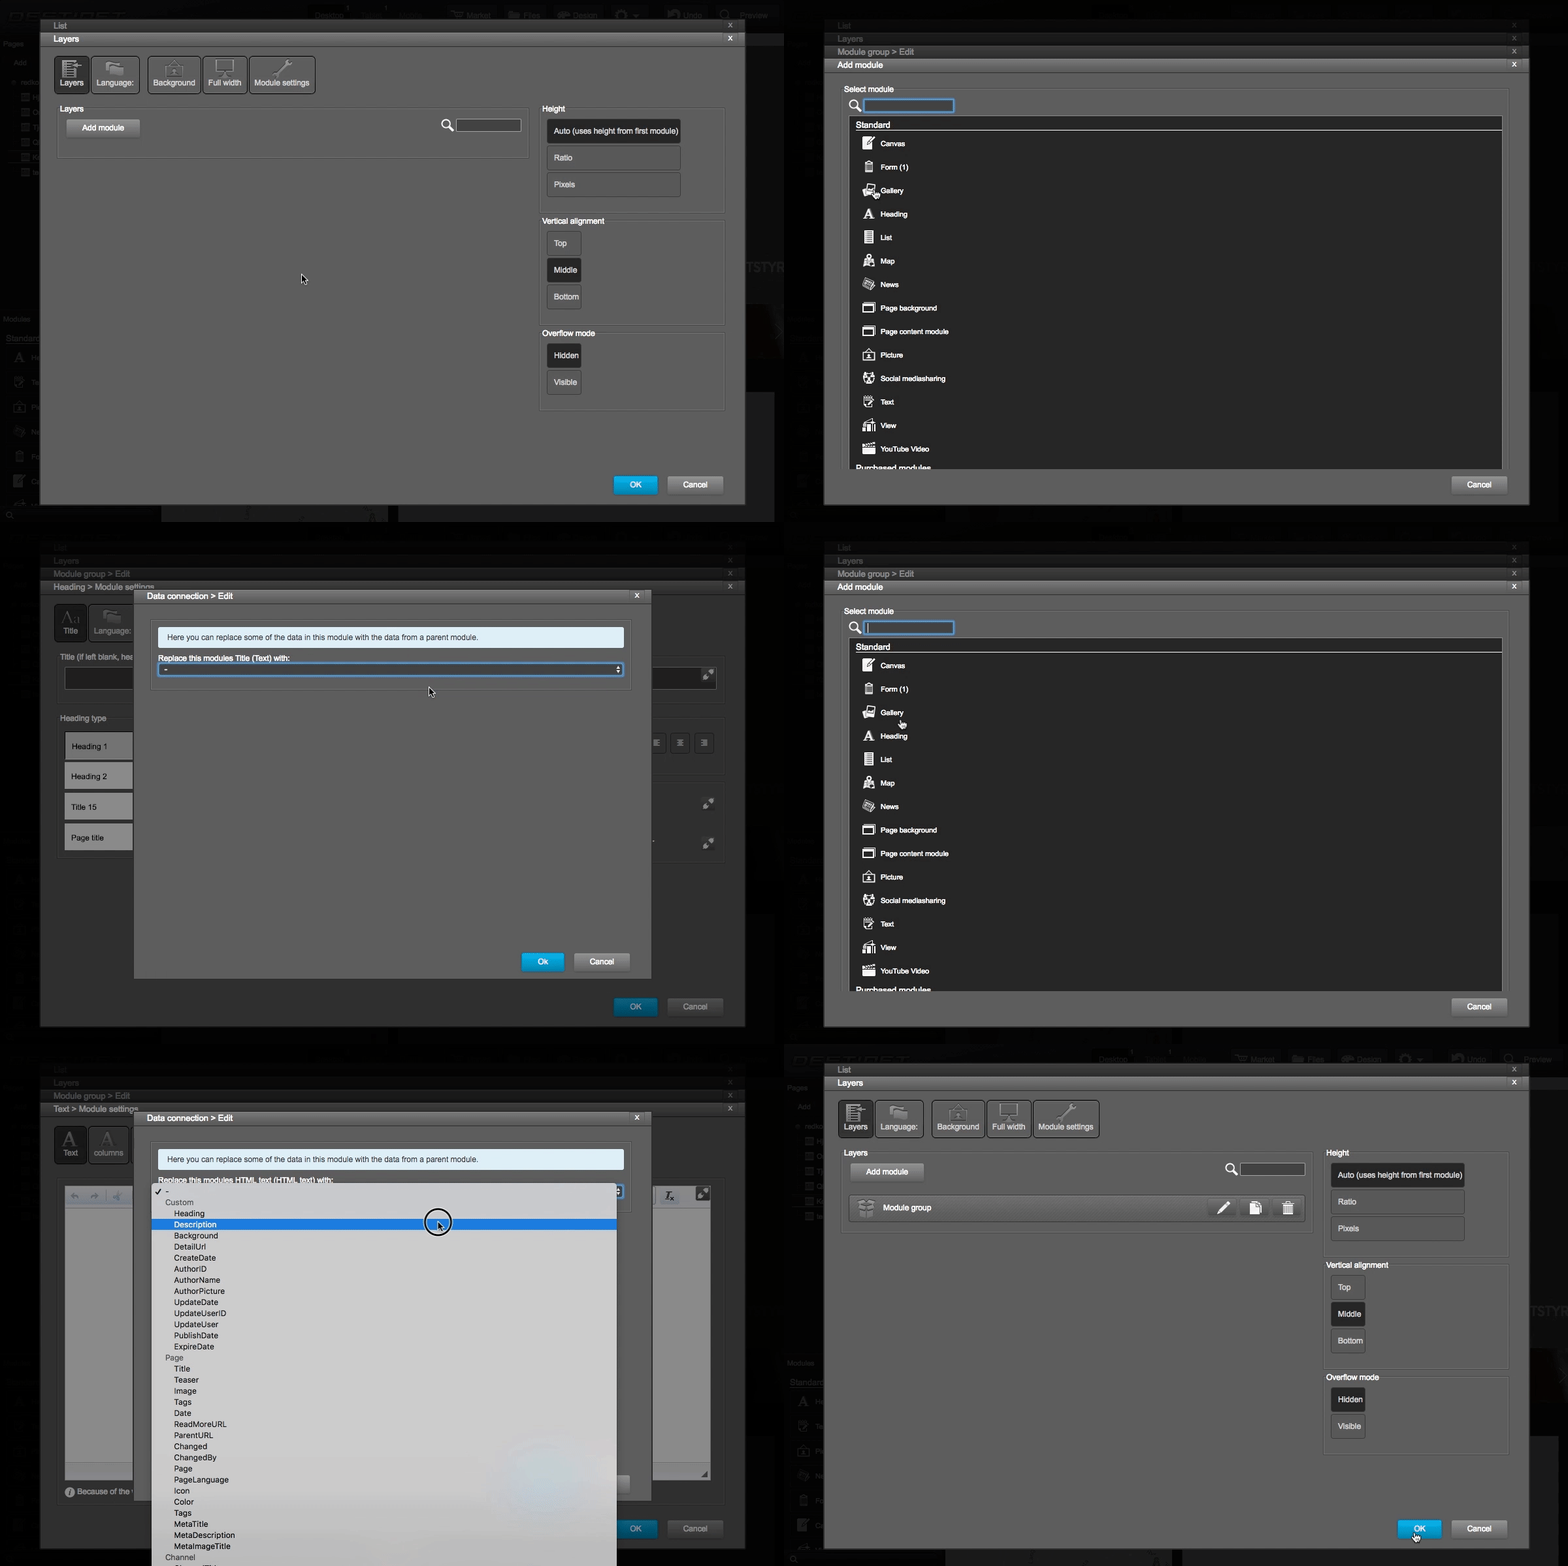
Step 3: Setting up list template
- Select Layer tab in Layer module
- Click Add module, find and select Module module
- Click Add module, find and select Heading module.
- In Title input, select Plug in icon, and select Heading option which we have created in Step 1. Select Heading style below then click OK to save
- Click Add module, find and select Text module.
- In HTML input, select Plug in icon, and select Description option which we have created in Step 1. Then click OK to save
- Click OK to save Module Group
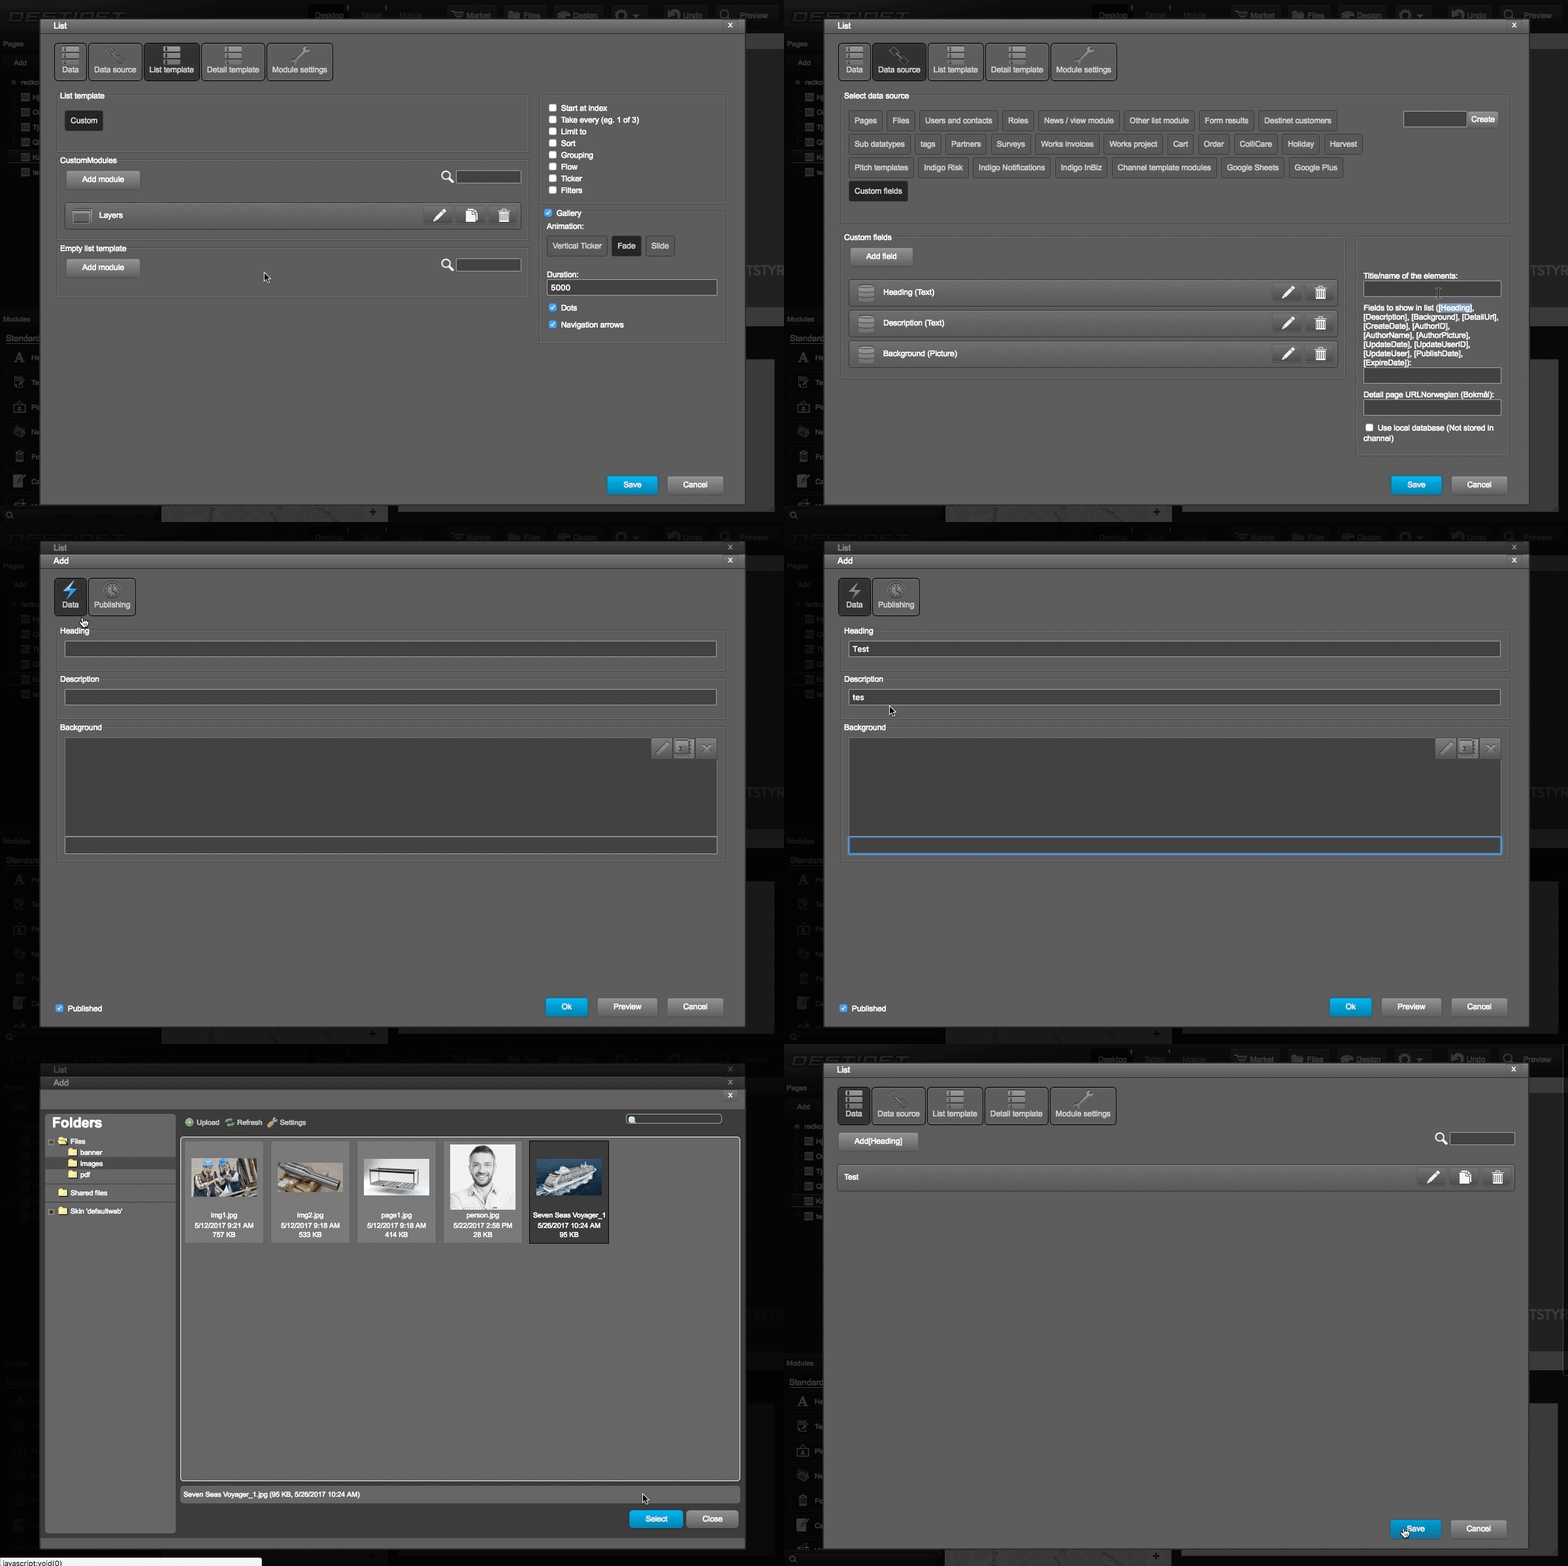
Step 4: Adding data to gallery
- Go to Data source tab, in the 'Title/name of the elements', copy any field below to input. In this example we use [Heading]
- Click Add in Data tab of List module to add gallery slider data
- There are 3 Data fields for a gallery slide which we have created in Step 1 and 3.
- Input your own data and add some more slide
- Click OK and explore the gallery slider


